Water features are the most sought after addition to the landscape nationally, according to Aquascapes market research. And who wouldn’t enjoy their own little piece of nature in their own back yard.
The big question is if it is sustainable to incorporate a water feature in your Outdoor Living Spaces or among your flower beds. There are a couple of things to consider before putting a windmill in place of your beautiful pond. 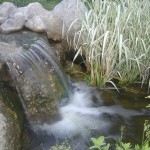
The first point is that a water feature changes microclimates. Microclimates are the little pockets of climate surrounding the home and throughout your landscape.
Utah begins as hot and dry. When you add a nice, unshaded patio, you increase the temperature around that area, making that spot a little warmer than normal. The same can be said for things like a driveway or a large surface on your home which either traps the heat, warming up the area next to the home or reflects the heat back onto the ground, causing the landscape further out from the home to be warmer.
Shade trees obviously have the opposite effect on the landscape, cooling down the ground and reducing temperature.
There are several tricks to controlling the microclimates in your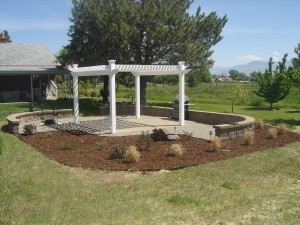 landscape with smart plantings and shade structures around potential heating elements in the landscape. Another addition that can help to control microclimates is a water feature. Water features do two things: they cool down the air around the water feature and they increase the humidity in the air, both great things here in the hot, dry climate.
The second thing to understand about water features is that when they are properly installed, they actually use very little water, especially compared to how much people enjoy watering their lawns.
Last, a water feature tends to encourage people to spend time outside, just like an oasis in the desert. A good water feature together with and Outdoor Living design means people are spending more time outside than inside meaning that less water and energy are being used inside the house.
I feel it is important to mention that a water feature with a leak is a huge waste of water, somewhat like having a water faucet that drips. 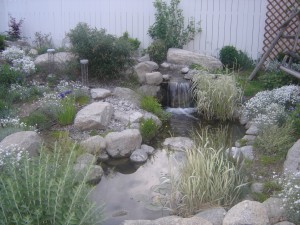 It adds up over time. So make sure the install is done properly and, at the first sign of any leak, fix the problem immediately.
While I realize everything I have written sounds speculative and I have not cited specific scientific research to support anything I have said, I do believe that water features are worth the investment and do not negatively impact your monthly bills or establishing a sustainable landscape.
In the post before this, I compared the soil with a bank and your plants with investments. As with any investment, your plants need to be constantly monitored and adjusted to keep them healthy in your Outdoor Living Spaces and flower beds.
 Investing in a business and controlling a business are very different things. If you are good at managing and growing a business, you have the potential to make a lot more money by investing in and controlling the business. You should look at the plants in your landscape as being little businesses that you not only are investing in, but also controlling.
Plants and trees tend to grow and branch out like a business and, just as with a business certain branches tend to take more capital and produce less. When a business has parts that are not pruductive, those parts need to be removed to keep the business healthy and so, with plants some pruning needs to be done periodically to keep the plant healthy and producing.
It goes without saying that a plant that has more branches, leaves, flowers and fruit will use more water. Also, it is important to know that a plant in its natural habitat grows very differently than a plant in your yard.
Natural settings are much more harsh than urban settings. We baby, spoil and pamper our plants and they are very obese in our yards. The idea is to maintain the plant in a healthy form, not an obese form. The best way to do that is through proper deadheading and pruning.
Deadheading is the process of 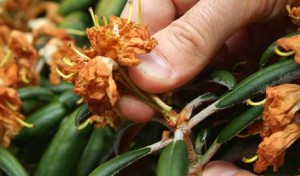 removing dead flowers after their prime. A plant’s main goal in life is to continue its species through reproduction, not unlike the animal kingdom. As such, fruit and seeds tend to follow flowers. We don’t need fruit and seeds on most of our plants in our landscape and so removing flowers after their prime prevents valuable water and nutrients from being used in the production of fruit and seeds.
Likewise, shrubs and trees tend to become quite overgrown and produce an excess of branches and leaves. These also are not necessary for the health of the plant. 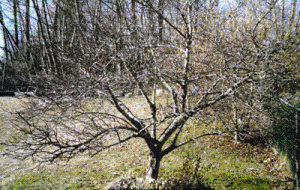 A proper pruning plan should be implemented to prevent the waste of water and nutrients on unnecessary wood and leaves. Again I recommend the website mentioned in a previous post on increasing the life of your trees.
So, in summary, just like with a wise investment, your plants need to be watched carefully and you need to not be afraid to prune out the material that is wasting your resources and not producing in a healthy way in order to make your landscape more sustainable. You can do this through deadheading and pruning.
In your Outdoor Living Spaces and flower beds, your soil is your bank. You deposit in your bank water and nutrients to invest in your plantings.
As in business, you have to protect your ‘seed’ capital and invest it wisely in investments that will produce the desired return. Some investments are higher returning but also higher risks. Others are lower risk, but also lower return.
Either way, you need to make sure the bank in which you keep your ‘seed’ capital is protected properly, or else you run the risk of losing the water and nutrients you plan to invest in your plantings.
There are several potential thieves for your bank. The first thief does a pretty good job blending in initially with your plantings. It is very sneaky and slowly deprives your soil of the water and nutrients. 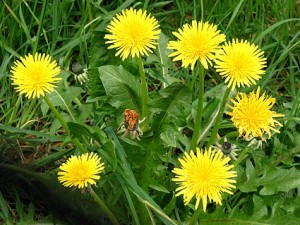 Suddenly, one day you look and notice the nasty little perpetrators have become quite large and are difficult to eliminate. These thieves are weeds.
Weeds are not just unsightly, but they also steal water, nutrients and sunlight from your plantings. Controlling weeds, therefore, is not merely an aesthetic thing, but also is very important for the health of your plants.
A second thief to watch out for is much more obvious than the weeds. This thief is very flamboyant and makes the fact that it is robbing your soil no secret at all. This thief spends all day long robbing your soil, every day. He robs from your soil, but he also invests in your plantings and weeds, in fact his contributions are absolutely necessary to the success of your plantings. This thief is the sun.
The sun is obviously necessary to the health of your plantings, and perhaps is inappropriately referred to as a ‘thief.’ The sun does nevertheless take water and nutrients from the soil.  As the sun beats down on the bare soil, water moves slowly upward to the surface and then evaporates and leaves the ground. As the water moves up to the surface, it takes with it several soluble nutrients. When the water hits the surface and evaporates, it leaves behind those nutrients which then react with other nearby things and turn to salts. These salts can not be used by the plants, so the sun takes both water and nutrients from your plantings.
Obviously, you can eliminate weeds through many methods–chemicals, pulling, burning, etc. The sun, however is more difficult to control. There is an excellent way to control both thieves at the same time and that is by covering all bare ground. This can be done with plantings, especially invasive ones like grass, or with mulch.
Mulch is a great tool for creating a sustainable landscape and conserving water. Three to four inches of mulch on all bare ground will lower the temperature of the soil surface preventing rapid evaporation, and prevent most weed seeds from germinating and beginning to grow.
Additionally, an organic mulch like compost or shredded bark, 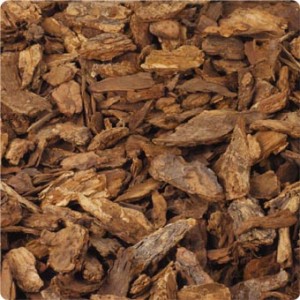 will break down and improve the soil structure by creating larger ‘holes’ in your soil for water and nutrients to penetrate.
Many different types of materials have been used as mulch. Some of the most common are bark chips, compost, rocks, plastic, weed fabric and, more recently, shredded rubber. I recommend using an organic mulch when it can be fit into your design scheme.
One other note I would make here is that you do not need to used weed fabric and another type of mulch on top of the fabric. Three to four inches of mulch will be just as effective at preventing weeds and holding in water as using weed fabric underneath. Not to mention, it requires a lot less effort to install and maintain. So in case you didn’t catch it here the first time, I do not use weed fabric!
As I mentioned earlier, a healthy ground cover is one of the best types of mulch. So follow my tips on keeping your lawn healthy to develop an ideal mulch and prevent weeds. A healthy lawn will have no weeds in it.
Whatever you use for mulch, the mulch will protect your bank and make sure that the water and nutrients you place in it will go toward the health of your plants and make your landscape beautiful and healthy.
In a perfect world, you have the resources to start from the beginning with the design phase of your irrigation system, whether your landscape is installed or not, and create a water system that both creates a foundation for very healthy plants and uses as little water as possible to do so.
It is irrelevant whether your end goal is to put more money in your pocket each month by lowering your water bill (and other bills which I will talk about in following posts), or to be a responsible steward of the beautiful Earth that we have be given. You kill two birds with one stone by implementing strategies for a sustainable landscape in your Outdoor Living Spaces and flower beds.
Utlimately, a healthy landscape that is properly watered will bring more savings to you than a lower water bill. In Utah, it is actually quite difficult to save much money by lowering your water bill because the water is so inexpensive. But there are several other benefits that will affect your pocketbook which, as I already mentioned, I will discuss in subsequent posts.
For now, focus on proper watering because the factor that most affects the health of your plants is the soil and you can’t do much of anything in Utah to change the soil, but you can water properly, which is the second most important factor in the health of your landscape.
So whether you have the resources to start from scratch or you only plan to make small adjustments over a long period of time, you can make a difference and be more responsible while saving money.
First, I would like to include the links to all of the posts about application types here below so you can easily reference them if you have questions.
Watering with a Firehose: Introduction Watering with a Firehose: Sprays Watering with a Firehose: Rotors Watering with a Firehose: Impacts Watering with a Firehose: Drip Emitters Watering with a Firehose: DriplineMy expert advice on how to start making changes is listed here below, in no particular order:
Whatever small or large adjustments you make, keep in mind that the health of your plants will improve given enough time, but you should be able to see an immediate change in your water bill. Please remember that making all of these adjustments is completely null and void if you do not make the effort to set your irrigation clock correctly!
I mentioned in the previous post (Watering with a Firehose: Drip Emitters) that there are two types of application when it comes to drip. Poly tubing with built in emitters is the second type of drip and perhaps more commonly used for Outdoor Living Spaces and flower beds than the emitters. 
Landscape dripline is little more than a glorified soaker hose and instead of distributing water to individual plants, relies more upon the flood irrigation method of watering. Dripline is poly tubing with evenly spaced emitters that release water slowly. The water spreads out a short distance from the tubing, but basically waters only right next to the tubing. There is an excellent application for dripline, and I will discuss this application in the next post.
Even though dripline uses less water than broadcast watering (sprays), it still does not conserve water like emitters do, largely because it waters bare soil. Dripline would therefore rank somewhere between emitters and sprays in efficiency when used for large flower, shrub and tree plantings.
Despite the lack of efficiency, dripline is still looked upon as a social statement, boldly declaring one’s green-ness to the world. I applaud sustainable landscapes for the money-saving strategies and responsible stewardship of our water resources, but perhaps dripline should not be lauded as the answer to saving and being responsible–at least when it comes to large perennial, shrub or tree plantings.
As I mentioned earlier, dripline works great for flood irrigation. This is best achieved by creating a grid with a supply line running around the perimeter of the area and dripline evenly spaced in parallel lines, crossing the area.
I commend you if you have installed dripline in your yard! You have taken great steps toward saving money and being responsible. Also, it is very simple to adjust dripline to a more efficient method.
Drip is an outstanding tool for creating a sustainable landscape.
When speaking of drip, there are two types of drip, each of which has an application for which it is best suited in your Outdoor Living Spaces or flower beds. In this post I will be describing the benefits and disadvantages of drip emitters.
Drip emitters, shown here at the right, are used with naked drip tubing (poly pipe with thin walls and no built in emitters.) These emitters are inserted into the drip tubing by puncturing the tubing with the barbed side of the emitter.
Once inserted, there are many techniques that can be used to get the water to the plant. My favorite is to attach 1/4″ spaghetti tubing to the open end of the emitter and then run the spaghetti tubing to the individual plants and use a stake and bug diffuser cap at the end to hold it in place. I know, confusing at first, but it actually is quite simple once you have done it a couple of times.
I love drip emitters! You can water hundreds of plants using this technique and the water only goes to the base of each plant. This reduces waste water and weeds because the bare ground is not getting watered.
Additionally, these work great with heavier clay soils that don’t accept the water very well because the water is applied at a much slower rate so it gives it time to sink in to the ground. Again, check the Three Things You Are Doing to Kill Your Lawn series of posts to understand why that is important.
Along those lines, there are several different types of emitters with the difference being how much water comes from each emitter per hour. I usually go with one gallon per hour on my emitters. At one gallon per hour, I will typically use one emitter for each one gallon or smaller perennial, two emitters for each three, five or ten gallon shrub and four emitters for each fifteen to twenty-five gallon or about one inch calliper tree.
The biggest disadvantage of drip emitters is the potential for them to get clogged. You must use a filter on your system to use drip and be very careful during repairs to not get dirt in the lines.
I have found, though that oftentimes your best friend is a clogged emitter. The reason I say this is because several plants, especially trees and shrubs, really don’t need much water in Utah outside of the snow pack from the winter and the occasionaly rain showers we receive. People, however, feel the compulsory need to water, and so a clogged emitter can prevent your plants from getting unneeded water.
An easy way to monitor whether your emitters are working or not is to use the finger test. Stick your finger in the soil after a watering around each plant and if the soil is moist, you are good. I would only check this once or twice a year and outside of that, I only check if a plant is starting to look somewhat dry. As I mentioned before, the success of your garden depends directly on the number of hours your shadow crosses it!
 Impact heads are the heads popularly known as rainbirds–at least to people in Utah. These are also the heads that inspired the dance move and several jokes I have heard.
These heads are likewise celebrated by those who understand irrigation as the most efficient heads on the market! If you are going to water a large area then these are the best heads to use…and in the words of Frank Catton (Bernie Mac), “Nuff Said!”
In fact, I would go so far as to say that if you are going to use one of the three heads mentioned to water your Outdoor Living Space or Flower Bed, then you should design that area to have at least 30 foot to 45 foot dimensions so you can use these heads to water. That is what I do.
These heads do have negatives. They do have to be nozzled up like the rotors, so check out the previous post for information on how to do that best.
They also can only be used on larger spaces and operate ideally at 60 p.s.i. So design your spaces to be larger and use a pump if you have to raise your pressure in your system. If is worth it to be able to use these heads.
The last disadvantage of these heads is that they can have lawn or groundcover grow into the casing, causing them to get plugged up and stop working. The answer to this is to make sure to keep the plantings directly around them trimmed back.
In case you hadn’t noticed yet, these are my favorite heads to use when watering with overhead spray heads!
Rotors are a great way to water large areas.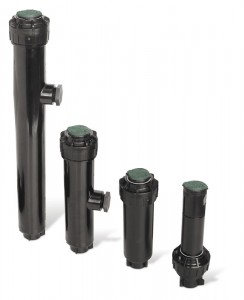 Rotors are significantly enough more efficient than spray heads that they should be considered whenever possible.
Care should be taken with rotor heads to make sure that you put the proper nozzle in each head so that they are all matched precipitation rates (see the explanation of matched precipitation rates in the spray head post). This takes a little bit of thinking when designing your system for your flower beds or Outdoor Living Spaces.
I will not get into this in too much detail but there are two ways to handle matching the precipitation rates.
The first way to match the precipitation rates is to find the inches per hour for a nozzle and then install the smallest rate in the quarter sprays, approximately two times the quarter rate in the half sprays, and about four times the quarter rate in the full sprays. This will ensure that the water will be applied evenly.
The thing to keep in mind with this method is that the nozzle that you will put in the full head will spray a lot farther and potentially result in a lot of watering concrete, but the efficiency is worth the trade off to me. Design around the shortest distance and deal with the overspray.
The second way to handle matching precipitation rates begins with the design phase. Break up the system so that the quarters and halves are on a valve together and the fulls are on a valve together. You then proceed as mentioned earlier with nozzling the quarters and halves, but the fulls will get either the same nozzle as the quarters or the same nozzle as the halves.
You manage the difference on the clock with the watering duration. If you use the same nozzle as the quarters, you will set that station for four times the run time of the quarters and halves. If you use the same nozzle on the halves and fulls, you set the run time on the full heads for twice that of the other. This is a tricky little way of controlling the efficiency and being able to prevent a lot of overspray. See the Watering Your Landscape in Utah posts for setting your clock.
As far as the disadvantages of these heads, they do have working gears inside them so there is the increased potential of those parts breaking–at least more so than for spray heads.
Also, there are rotor heads that will cover areas down to as small as about fifteen feet, but any smaller and you have to use the spray heads.
Last, these heads operate most efficiently at about 55-60 p.s.i., so they are right out when it comes to low pressure systems without the aid of a pump. Operating at a pressure that is too low will result in cute little green rings around the heads.
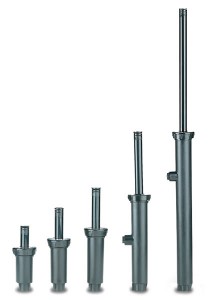 Spray heads, like the ones to the left here, are probably the most common heads used for watering Outdoor Living Spaces. This has become the ultimate tool for those who don’t understand irrigation principles.
The biggest advantages of these heads are that they are easy to use efficiently because most of the nozzles you would use on these heads all have matched precipitation rates (MPR). This means that the water is applied evenly across the landscape where they are used.
These heads also work very well for small areas and for places where the water pressure is lower than normal. I always recommend using the heads with the built in PRS (Pressure Regulating System) because they operate most efficiently at 30 p.s.i. and most sources for irrigation are pressurized much higher than 30 p.s.i.
Despite the advantages, these heads are the proverbial firehose. These heads will apply around two inches of water across your landscape in around an hour. Remember that in a previous post , I mentioned that Utah receives on average between eight and sixteen inches of total precipitation in a whole year! Firehose!
These are also the most readily available head to the general public, so the ambitious individual who is installing his or her own system will most likely use these heads. With appropriate scheduling, and design these heads can be a solid source for watering your landscape, but most people installing them do not know how to use them appropriately. The result is a lot of water and money going right down the storm drain.
These heads do have an application in Flower Bed Design. I will discuss that in a following post.
I remember a scene from the movie UHF where Michael Richards rewards a young boy for finding a marble in a sandbox full of oatmeal with a drink from a firehose. The phrase that ‘it is like taking a drink from a firehose’ has since always conjured up the image of the little boy sitting on a toy horse with a cowboy hat on and getting shot across the room as he enjoys his drink from the firehose.
So my question to you is if you are dressing your landscape up in the same little, cute cowboy outfit and making it drink from the firehose? Because, chances are that if you do not have the correct water application for your plants, you are doing just that to them!
Of course the question is what can you do to remedy the problem in your Outdoor Living Spaces? Proper water application naturally starts with proper landscape design and flower bed design, but let me begin this series of posts with a description of the basic application types: spray heads, rotor heads, impact heads, drip emitters and drip tubing. Then I will discuss what you can do in your landscape to conserve water, save money and improve the health of your plants whether you are in the design phase or looking to upgrade.